The reason for choosing Ubuntu22.04 is that the simulation engine we use, webots2023b, is compatible with the Linux system version Ubuntu22.04.
If you have installed another version of Linux, you can refer to the webots code repository to download and configure the appropriate version.
Download the deb package of webots 2023b version (e.g., webots_2023b_amd64.deb) and the asset files (assets-R2023b.zip) from webots, and install them using the following command:
Webots Installation
## install
sudodpkg-iwebots_2023b_amd64.deb
## run
webots
## Simulator requirements
sudoapt-getinstalllibeigen3-dev
sudoapt-getinstallnlohmann-json3-dev
sudoaptinstallsumosumo-toolssumo-doc
pipinstalllxmlpyprojshapelywebcolorsconfigparser--user
pipinstalltransforms3d
## config
gedit~/.bashrc
# Change dir according to your installationexportSUMO_HOME=/usr/share/sumo
exportWEBOTS_HOME=/usr/local/webots
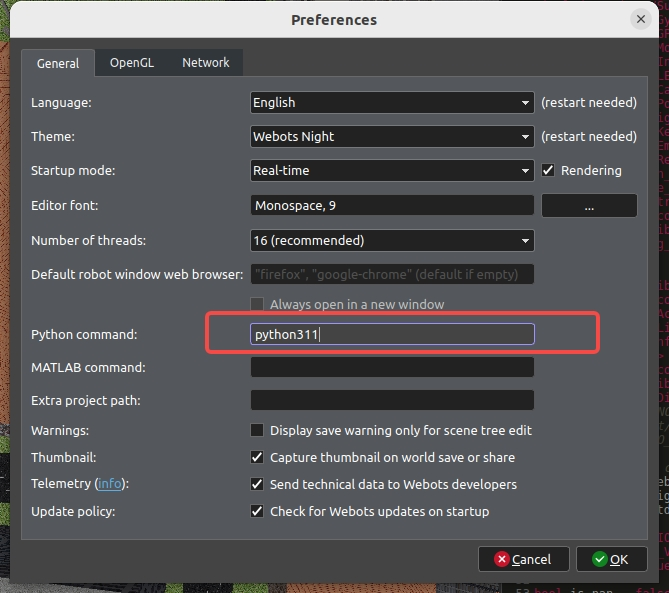
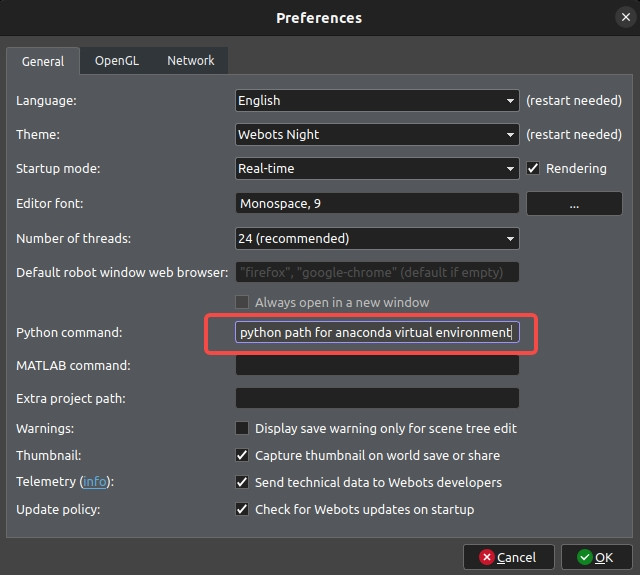
Step3 Modify the Python environment for running Webots
Since the environment we are using is different from Webots’ default Python environment, we need to create symbolic links for our new environment and configure it.
Note: Although this project has been tested and can run on Windows systems, due to the relatively complex compilation and installation process of related cpp libraries, it is not recommended to use Windows systems!
Download the webots 2023b version installer ( .exe file) and the asset file ( assets-R2023b.zip ) from webots.
Copy the assets to the specified path: C:/Users/<USER>/AppData/Local/Cyberbotics/Webots/cache/assets Then open Webots. If the environment displays correctly during the tour guide stage for new users, the installation is complete.
Step2 Create Virtual Environment and Install Libraries
3. Webots' makefile configuration (can be ignored if the C++ part does not need to be recompiled)
Paths of makefile files that need to be modified include:
Webots_Simulation/traffic_project/controllers/drone_ctrl2/MakefileWebots_Simulation/traffic_project/controllers/simpleCar_ctrl/Makefile
Since the Linux system generally does not require additional settings for include paths, a check for the Windows system has been made. If it is a Windows system, you need to manually modify the makefile of the drone_ctrl2 and simpleCar_ctrl controllers, adding the include paths for eigen and nlohmann_json.
Among them, INCLUDE+=-ID:/cppLibrary/include/Eigen3/include/eigen3 needs to be configured as the path to the Eigen3 library.
INCLUDE+=-ID:/cppLibrary/include/nlohmann_json/include needs to be configured to the path of the nlohmann-json3 library.
After completing the above modifications, you can open the controller in the Webots editor and recompile it.
4. Install sumo
Follow the instructions in the sumo-interface.md document for installation.
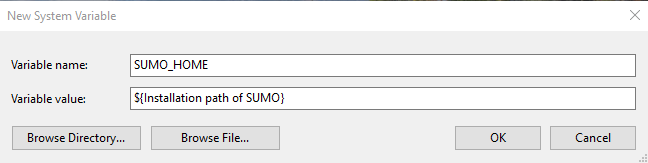
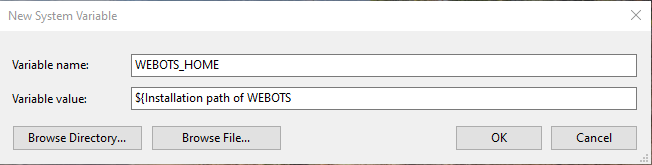
5. webots and sumo environment variable configuration
First, press WIN+R to bring up the Run window, then type sysdm.cpl to open the System Properties page. Next, select “Advanced” -> “Environment Variables” -> “System variables” -> “New”.
Insert SUMO_HOME configured as shown in the following figure:
## Simulator requirements
sudoapt-getinstalllibeigen3-dev
sudoapt-getinstallnlohmann-json3-dev
sudoaptinstallsumosumo-toolssumo-doc
pipinstalllxmlpyprojshapelywebcolorsconfigparser--user
pipinstalltransforms3d
## config
gedit~/.bashrc
# Change dir according to your installationexportSUMO_HOME=/usr/share/sumo
exportWEBOTS_HOME=/usr/local/webots
Add Python symbolic Links:
## Create symbolic link for algorithm side Python
ln-s/root/miniconda3/envs/uav_follow_alg311/bin/python3.11/usr/bin/python311
## Create symbolic link for simulation side Python
ln-s/root/miniconda3/envs/uav_follow311/bin/python3.11/usr/bin/python311
mv/usr/bin/python3.10/usr/
## Run simulation initialization code, ensure the program completes initialization before proceeding
condaactivateuav_follow311
xvfb-run-awebots--stdout--stderr--no-rendering--batch--mode=fast${map_file}
psaux|grepxvfb
x11vnc-display:99-auth***